
In Chapter 3, we built a ball that bounced around the screen entirely on its own. It was fun to watch, but it wasn't really a game because you couldn't interact with it.
In this chapter, we are going to fix that. We are going to build a new project that listens for your finger tapping the screen. We will use the if and else statements we learned in Chapter 4 to figure out exactly where you tapped, and we will change the background color and the direction of our moving shape instantly.
By the end of this chapter, you will understand how to make an Android app react to user input.
In this chapter, we will:
- Set up a new project called TapResponder.
- Add wrap-around logic to our moving shape (instead of bouncing).
- Override the
onTouchEventfunction to catch screen taps. - Use
ifstatements to check if the user tapped the left or right side of the screen. - Change variables on the fly to instantly update the game state.
- Try an AI exercise involving user input.
Code for this chapter: the complete project lives in the
Chapter 5folder of the accompanying code at github.com/EliteIntegrity/Learning-Kotlin-by-Building-Android-Games.
Setting Up the Project
Let's get the boilerplate out of the way.
- Create a New Project in Android Studio.
- Pick Empty Views Activity.
- Name the application TapResponder.
- Make sure the Language is set to Kotlin.
- Click Finish.
When it loads, open MainActivity.kt and delete the auto-generated code, just like always.
The Code
Type or paste the following code into your empty MainActivity.kt file.
package com.example.tapresponder

import android.content.Context
import android.graphics.Canvas
import android.graphics.Color
import android.graphics.Paint
import android.os.Bundle
import android.view.MotionEvent
import android.view.View
import androidx.appcompat.app.AppCompatActivity

class MainActivity : AppCompatActivity() {
    override fun onCreate(savedInstanceState: Bundle?) {
        super.onCreate(savedInstanceState)
        setContentView(TapResponderView(this))
    }
}

class TapResponderView(context: Context) : View(context) {

    private val paint = Paint()

    // Our shape's variables
    var squareX = 400f
    var squareY = 500f
    var squareVelX = 0f  // Starts stationary horizontally
    var squareVelY = 10f // Moving downwards
    val squareSize = 100f

    var backgroundColor = Color.DKGRAY

    init {
        paint.color = Color.CYAN
        paint.style = Paint.Style.FILL
    }

    override fun onDraw(canvas: Canvas) {
        super.onDraw(canvas)

        // Draw the background using our variable
        canvas.drawColor(backgroundColor)

        // Update position
        squareX += squareVelX
        squareY += squareVelY

        // Bounce off the top and bottom walls
        if (squareY < 0f) {
            squareY = 0f
            squareVelY = -squareVelY
        } else if (squareY + squareSize > height.toFloat()) {
            squareY = height.toFloat() - squareSize
            squareVelY = -squareVelY
        }

        // Wrap around the left and right walls to keep it interesting
        if (squareX > width.toFloat()) {
            squareX = -squareSize
        } else if (squareX + squareSize < 0f) {
            squareX = width.toFloat()
        }

        // Draw the square
        canvas.drawRect(squareX, squareY, squareX + squareSize, squareY + squareSize, paint)

        // The Game Loop
        invalidate()
    }

    // This function catches user taps!
    override fun onTouchEvent(event: MotionEvent): Boolean {

        // We only care about the moment the finger touches the screen (ACTION_DOWN)
        if (event.action == MotionEvent.ACTION_DOWN) {

            // Did they tap the left half of the screen?
            if (event.x < width / 2) {
                // Move left
                squareVelX = -15f
                backgroundColor = Color.parseColor("#440000") // Dark red background
            } else {
                // They tapped the right half! Move right.
                squareVelX = 15f
                backgroundColor = Color.parseColor("#000044") // Dark blue background
            }
        }

        // Return true to tell Android we successfully handled the touch event
        return true
    }
}
Understanding the Code
Let's break down the new concepts in this project.
The View and Variables
Our TapResponderView starts with some familiar variables. This time, we are drawing a square instead of a circle, so we use squareX, squareY, and squareSize.
We also added a new variable: var backgroundColor = Color.DKGRAY. In previous chapters, we hard-coded the background color directly in the drawColor function. By storing it in a variable, we can change it later while the game is running!
The Game Loop and Drawing
Inside onDraw, we do the standard game loop updates. Notice the code for the left and right walls:
        // Wrap around the left and right walls to keep it interesting
        if (squareX > width.toFloat()) {
            squareX = -squareSize
        } else if (squareX + squareSize < 0f) {
            squareX = width.toFloat()
        }
Instead of bouncing, we are wrapping the square. If the square goes completely off the right side of the screen (squareX > width), we instantly teleport it to just outside the left side of the screen (-squareSize). This makes it look like it seamlessly traveled through a portal from one side of the screen to the other!
Catching User Taps
Now for the magic. Below onDraw, we added a brand new function:
override fun onTouchEvent(event: MotionEvent): Boolean {Just like Android automatically calls onDraw when it needs to paint the screen, Android automatically calls onTouchEvent whenever the user touches the screen. It passes us an event object that contains all the information about that touch (where it happened, whether they are swiping, etc.).
if (event.action == MotionEvent.ACTION_DOWN) {A single tap actually generates multiple events: putting your finger down, moving it slightly, and lifting it up. We only want to trigger our logic the exact moment the finger hits the glass, which Android calls ACTION_DOWN.
Now we use our if and else statements to make a decision:
            if (event.x < width / 2) {
                // Move left
                squareVelX = -15f
                backgroundColor = Color.parseColor("#440000") // Dark red
            } else {
                // Move right
                squareVelX = 15f
                backgroundColor = Color.parseColor("#000044") // Dark blue
            }
We ask the event object exactly where the finger touched horizontally (event.x). We divide our screen's width by 2 to find the middle. (Remember from Chapter 2 that width is an Int, so width / 2 uses integer division and rounds down — but we only need the rough middle of the screen here, so a fraction of a pixel either way makes no difference.)
If the tap's X coordinate is less than the middle, they tapped the left side of the screen! We immediately set the square's velocity to -15f (moving left) and change the background color variable to dark red.
If the tap was not on the left side, the else block runs. It must have been the right side! We set the velocity to 15f (moving right) and change the background to dark blue.
Finally, we return true to tell Android, "Thanks, we handled this tap, you don't need to pass it to anyone else."
Running the Game
Hit the green Play button.
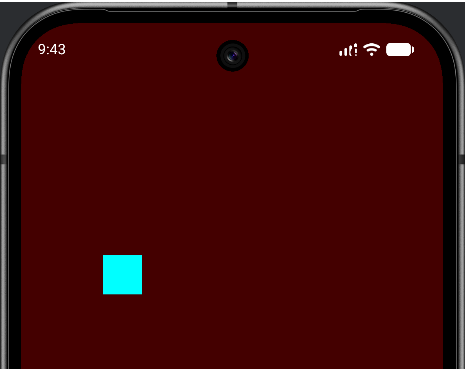
When the app launches, the background will be dark gray, and a cyan square will be moving straight down (because squareVelX starts at 0).
Now, tap the left side of the screen! The background instantly snaps to dark red, and the square starts moving diagonally left. Tap the right side! The background snaps to dark blue, and the square darts to the right.
You have built a fully interactive application.
Experimenting
As with the bouncing ball, the best way to make this code your own is to change it and see what happens. Each of these is a small tweak.
- Make the taps faster. Change
squareVelX = -15fand15fto-40fand40f. The square now darts across the screen. - Change the colors. Swap the hex codes in
Color.parseColor("#440000")for your own. The format is#RRGGBB— two hex digits each for red, green, and blue. Try"#004400"for a dark green. - Tap to stop. Add a check: if the tap lands very close to the middle of the screen, set
squareVelX = 0fso the square stops drifting sideways. (The AI exercise below walks through exactly this idea.) - Speed up the fall. Change
squareVelY = 10fto something larger and watch the square race down the screen.
Notice again that none of these change the structure of the program. You are turning the dials, not rebuilding the machine.
Summary
You just combined variables, the game loop, and control flow into a working prototype.
By overriding onTouchEvent, you gained the ability to listen to the player. By using an if/else statement, you taught the game to analyze that input and make a decision. And by modifying variables (squareVelX and backgroundColor), you instantly changed the behavior and look of the game while it was running.
This input-update-draw cycle is the beating heart of game programming.
In the next chapter, we will learn about Loops (for and while). If if statements let us make decisions, loops let us do things over and over again without writing identical lines of code. It is how we handle 100 enemies on screen without writing 100 sets of variables!
AI Exercise (Optional)
Let's challenge the AI to help us expand our touch logic.
Open your AI chatbot and paste this prompt:
"I have a Kotlin Canvas app where I override
onTouchEvent. Currently, I use anif/elsestatement to check if the user tapped the left half or right half of the screen usingevent.x < width / 2. I want to change it so the screen is split into thirds (left, middle, right). I want the ball to move left if they tap the left third, stop moving horizontally if they tap the middle third, and move right if they tap the right third. Can you show me theif / else if / elsecode block for this logic? Assumeevent.xandwidthare available. Keep it simple and explain the math."
Review the AI's math carefully. Splitting things into thirds requires dividing the width by 3, but the logic for the middle boundary can be tricky to conceptualize at first. If it doesn't make sense, ask the AI to explain it again with an example where the screen is 900 pixels wide!