

This Kotlin beginner tutorial is an attempt to introduce readers with just a basic knowledge of Kotlin to game programming. Space Invaders is an all-time classic and my first experience with a video game outside of the home. When my dad would take me to the pub as a kid I wasn’t thinking about the coke or the crisps I might get but whether or not I would be granted 10p to have a game of Space Invaders.
![]()
I remember the thrill the first time I cleared a wave. I had been struggling to do it for a long time until I saw someone else do it and copied their technique. Rather than take out all the lowest invaders, the better tactic is to pick off a column at a time from either the left or the right. This way you can delay the invaders going lower and it is also easier to stay targeted on one column than it is to accurately move from one column to the next. The other trick was to blast a hole through the middle of a shelter and pick them off from relative safety.
While this tutorial will not have all the features or quite the same aesthetic as the original; it will enable the player to shoot through the shelters and the same column attack pattern is viable too. I hope you enjoy building this game. I will also be doing a video version of this tutorial so why not visit my YouTube channel.
Who this tutorial is for
The tutorial assumes you already know basic Kotlin like what a property is and how to create a class but I do give fairly in-depth explanations of most of the code. You should be able to follow along provided you have just basic knowledge of any object-oriented programming language, perhaps gained from the Java tutorials on this site.
The structure of the code
The project consists of six classes which are available on GitHub :
- KotlinInvadersActivity: This class is the entry point to the game and will initialize an instance of the class that does all the work as well as starts and stops the game loop/thread when the player starts and stops the app.
- KotlinInvadersView: This class is the class that does all the work. In fact, it probably does too much work and we can discuss that a bit at the end of the tutorial. It will hold instances of all the other classes and control their updating, interaction, and drawing to the screen. It will also handle the player’s screen touches.
- PlayerShip: This class will respond to the player’s touches and represent the ship that the player uses.
- Invader: We will instantiate dozens of these to build a whole army of arm-flapping, bullet-shooting Space Invaders. They will move from left to right drop down then go back again and repeat; until destroyed or landed on the Earth.
- DefenceBrick: Dozens of instances of this class will be instantiated in order to build destructible shelters that the player can hide behind and shoot a gap in to take cover while dealing damage.
- Bullet: We will use this class for both the player’s single reusable bullet and the invaders will have a reusable ArrayList full of bullets.
- SoundPlayer: A very simple class that uses the SoundPool API to play the various beeps and explosions we need.
Starting the Kotlin Space Invaders tutorial
Create a new project in Android Studio, I called mine Kotlin Invaders and be sure to check the box to Include Kotlin Support. I named the Activity; KotlinInvadersActivity and used the Empty Activity template without backward compatibility and without generating a layout file.
For Kotlin Invaders, we will use some bitmaps from external graphics files for the invaders and player ship and use the Canvas class drawRect function to represent the bullets and the bomb shelters.
Before we get coding we want to add the player ship graphic and two different graphics for the two frames of animation for our invader to our project files so we can use them in our code. The graphics are white so they are displayed below on a blue background. Here they are.
 The Space Invaders player ship graphic |
 The first frame of animation for the invader |
 The second frame of animation for the invader |
|---|
You can download them by right-clicking on the images and then selecting the Save image as… option. Just make sure the file names are kept the same. They are named playership.png, invader1.png, and invader2.png. Add the graphics to the res/drawable folder via the project explorer window.
The sound
We will have a menacing two-tone sound to represent the invader’s movement. This sound will speed up as the invaders speed up. I have called these two sounds “uh” and “oh” because if we were attacked by invaders we might say, “uh oh”. We also need sounds for shooting a bullet, the player being hit, an invader being hit and a bomb shelter being hit.
Of course, we need to add the sound files to our project. You can create your own or download mine by right-clicking on the files listed below. Just make sure you use exactly the same file names. You can also listen to each of the sounds by using the media controls below each of the links.
Next, using your preferred file browser, go to the app/src/main directory in your project and add a folder called assets. Now add the sound files to the assets folder.
Coding the Activity class
The first class we will code is the KotlinInvadersActivity class. Edit your code to match the following and then we can talk about it.
There will be multiple errors in the preceding code because we are instantiating a class ( KotlinInvadersView) that doesn’t exist yet. We will fix that shortly. The KotlinInvadersActivity class is the entry point for the game.
When the player taps to run the app, the onCreate function will execute. In the onCreate function, we use a Display instance and a Point instance to capture the resolution of the screen. This is necessary because the range of screens our game could be played on is so varied that we need to adjust our game objects to accommodate.
In the next line of code, we instantiate (or attempt to) our soon-to-be-written class. The thing to notice is what we pass into the constructor. We pass a reference to the Activity as well as the size object which contains our screen resolution.
The final line of code in the onCreate function calls setContentView to tell Android what to use as the view for this app. We will be using our KotlinInvadersView instance that we will code soon. The next two functions are onResume and onPause. The first is called by the operating system when our app is resuming from a pause; the second is when it has been quit by the user.
Note that onResume is also called after onCreate so will execute when the app is started by the user as well as when it resumes from a pause, perhaps when the user got a phone call. The functions simply call resume and pause on our KotlinInvadersView instance.
Coding the Kotlin game engine
Next, we can code the outline of the KotlinIvadersView class that we instantiated, passed to setContenView and called the pause and resume functions from. We will then have an error-free code base and will be able to run the game. KotlinInvadersView is the main class of the app and we will be returning to it throughout the project. To get it started, create a new class called KotlinInvadersView and code it as shown next.
In the class declaration, we can see that we receive the Context and the Point from the Activity class just as we should expect. Also, notice that we inherit from SurfaceView. The SurfaceView class inherits from View and is therefore suitable to pass to setContentView which we did back in the KotinInvadersActivity class. Also, notice we are implementing the Runnable interface. We will be running all our game logic and drawing code in a separate thread to the main user interface interaction. This way our game will run at around 60 frames of updates and animations per second while still listening and then responding to the player’s interactions. The rest of the preceding code sets up this game loop.
The properties include a Thread instance called gameThread. When we pass the KotlinInvadersView instance to the Thread constructor the OS will be able to call the overridden run function. The run function must be overridden because we implemented the Runnable interface. The run function is the basis of the game loop.
There are two Boolean properties called playing and paused and they will be used to control when we execute certain parts of the game loop.
Next, we have a Canvas and a Paint instance which together are used to draw bitmaps(like the invader graphics) and primitives(like the bullets and bomb shelters).
The score, waves, lives, and highScore properties do as their names imply and keep track of the player’s progress including saving their best-ever performance.
The menaceInterval property is the amount of time in milliseconds that we want to wait in between each flap of the invader’s arms and each playing of the uh or oh sound. The reason it is a Long is that we will do calculations using other variables that are also type Long. The uhOrOh Boolean tracks whether the next sound will be uh or oh and lastMenaceTime tracks the time we last menaced the player. This property is initialized by calling System.currentTimeMillis which returns the number of milliseconds since the start of January 1970. This number is obviously going to be quite big (understatement) and is why we use the Long type. If you want to find out why we use this measurement you can find out more here.
The prepareLevel function is currently empty but we will be calling it every time we need to set up a wave of invaders. As we code the various game objects we will return to this function to initialize many of them.
The run function is the brain of the operation. It is called by the operating system when it is our thread’s turn to execute. You can see inside the run function that all the code is wrapped in a while loop that executes when playing is true and inside that while loop we only call the update function when paused is false. Potentially, in fact, most of the time, we will call update and then draw on most executions of the thread. We have two variables fps and startFrameTime and they are used to calculate how long it took for the current pass through the run function. The value stored in fps at the end of each pass through the loop is how many frames per second would be achieved if every frame took the same amount of time as this one. We will see soon how we pass this value to each of our game objects so they can use it and work out how far to move each frame of animation. The code at the end of the run function which performs this calculation is wrapped in an if statement because if timeThisFrame is ever zero the division calculation would crash the game. It is worth studying the run function because it is key to understanding how everything else works.
The update function (that is called from the run function) is empty for now but notice its one parameter is fps so that when it updates all the game objects it can also be passed this vital information.
The draw function (that is also called from the run function) unsurprisingly is where we will do all the drawing. The code that was added within sets up the basics ready to draw the game objects. First, the entire code of the function is wrapped in an if statement that determines whether holder.surface.isValid is true. If it is it means that we are able to draw to the area of memory that holds the graphics. The next step is to call canvas = holder.lockCanvas that guarantees that some other process, perhaps the OS cannot also draw to this surface at the same time. We can now proceed to do some drawing.
The canvas.drawColor call draws a color to the entire screen. The color drawn is determined by the ARGB value. In this case, we pass in 255, 0, 0, 0. This is full opacity black as seen in the image of the game at the start of this tutorial. If you want to know more about how the ARGB color system works then take a look at this article.
Next, the code calls paint.color setter and this sets the color that will be used in any subsequent function calls using the canvas and paint objects. The code passes in 255, 0, 255, 0 which is full opacity green which is the color of the bomb shelters. You can see from the comment that follows that this is where we will draw all the game objects.
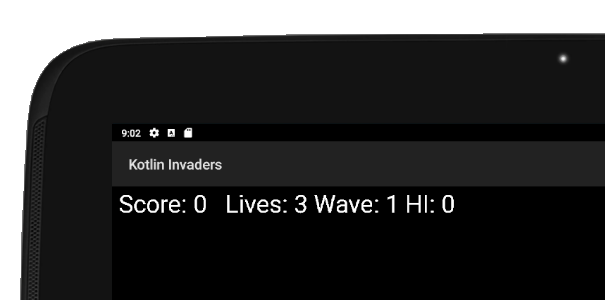
The next line of code calls paint.color again and sets the color back to white so we can draw the text for the player’s HUD. The textSIze property of paint is set to 70f which is a size that looks good on my current emulator. Obviously, adjust this if you are not happy with the results. Next, we draw some text to the screen using the canvas.drawText function and passing in a String template that prints the score, remaining lives, and the high score to the top-left of the screen.
The final line of code in the function is holder.unlockCanvasAndPost which passes all our drawings to be written to the screen. At this point other processes can access the graphics memory- but not for long because we will lock it again in about a sixtieth of a second.
The pause function is the function that we called from the onPause function of the Activity class. This means that every time the player leaves our game, either temporarily or permanently, this function gets called. For now, the only code in it sets playing to false so that update isn’t called anymore and stops the thread so that run isn’t called anymore. The code gameThread.join is the line that does the work and it is wrapped in a try- catch block as required. Near the end of this tutorial, we will save the high score to the device storage in this function too.
The resume function is called by the onResume function in our Activity class. This means that every time the player starts our game or resumes it after pausing, this function will be called and the thread will be started, playing set to true so the while loop executes and we also call the prepareLevel function which currently does nothing but will soon set up a wave of invaders, shelters and bullets.
At this stage, we can run the game for the first time. If you run it you will see that the score, lives, and hi-score text are drawn to the top left of the screen.
Coding the player’s spaceship
Let’s move on to the PlayerShip class. We will code the class in its entirety but will not make use of all the code until later because we need to write a class to represent the bullets it will fire. Create a new class called PlayerShip and add the following code to it and then we will review the new code.
The preceding code starts with the class declaration and the constructor receives three properties. The first is a Context object which is used to create and scale bitmaps. The second and third are Int values that will contain the horizontal and vertical resolution of the screen. We will use these values to scale and position the ship.
Next, we initialize an instance called bitmap with a call to BitmapFactory.decodeResource. The function takes the Context and the resource ID that represents the image we are using for the player’s ship. This property is declared as var because we need to reassign it shortly in the init block.
We have a property for each of the width and height of the ship. They are initialized arbitrarily but effectively by using the screen resolution divided by 20. We declare and initialize a RectF object which holds four Float values that represent a rectangle. This rectangle can be used for keeping track of and manipulating the position of the ship as well as quickly positioning the bitmap for drawing. The arguments sent to the constructor are derived from the screen’s resolution and the recently calculated width and height. The preceding logic will position the ship in the center bottom of the screen.
Following on we have a property called speed which is speed in pixels per second that we want the ship to move at. Shortly we will see how we combine this value with the frames-per-second passed from the update function in KotlinInvadersView to achieve a smooth animation when the player moves the ship. The code that comes next sets up a companion object. This means that they are already instantiated and not part of a specific instance- hence why it is called object. This means that these values will be accessible using the class name as opposed to an instance and will be useful for referring to the constant values assigned to represent moving left, moving right, and stopped. We then initialize the moving property with the constant value contained in stopped. The player’s ship will begin the game stopped, as you might expect.
In the init block which runs after the constructor and property initializations, the code calls Bitmap.createScaledBitmap passing in the bitmap instance and the size to scale it to. The result is reassigned to bitmap itself. Now the bitmap is ready to be drawn with the correct graphic that represents the ship and also the correct scale.
The update function does most of the work for this class. The code is structured into an if- else- if shape. The first if executes when moving is set to left and the player’s ship position (obtained from position) is further right than the horizontal coordinate zero. This means that the code to keep moving left will only execute when the ship is not about to disappear to the far left (like the Democratic party) side of the screen. The code inside the if statement subtracts from position.left based on the speed we want the ship to go and the current frames-per-second as supplied to the function. Remember this happens up to sixty times per second. The values will be manipulated very steadily yet very frequently, creating a fast and smooth animation.
The else if statement executes when the player is moving right but is not so far right (insert far-right joke for political balance) that it will begin to disappear off of the screen. Outside of the if blocks the right property of position is set using the just-updated left property and the width of the ship. The position RectF is now ready to be interacted with for collision detection and for drawing.
Now we can put the PlayerShip class into action inside the KotlinInvadersView class. First, add and initialize a new property to the class as shown next.
Next, we will call the update function of PlayerShip from the update function of KotlinInvadersView.
We can now draw the player’s ship inside the draw function. Remember that update and draw get called up to 60 times per second. So if the code in update changes the position of the ship it will animate smoothly. Add this code to the draw function.
The canvas.drawBitmap function uses the bitmap and position properties from the PlayerShip class as well as the paint property to get the bitmap drawing done.
Coding the space invaders
Let’s code the Invader class. Create a new class called Invader and add the following code to it.
The constructor receives a Context instance which like the PlayerShip class is used for preparing bitmaps. It also receives four more values. A row and column number along with the horizontal and vertical screen resolution. The last four values will be used to work out the size and starting position of each instance of the class. All we will need to do is decided the whereabouts in our grid of invaders each Invader instance should go and the Invader class will take care of the rest.
The properties include a width and height which are calculated by dividing the resolution by 35. This is arbitrary and you could adjust this for a size that suits you. A better way to do this would be to create a formula based on the physical size in inches, the resolution, and the ratio of width to height of the screen, but this way we get the game done a bit quicker. There is also a padding property which is used to determine the space in between each invader.
The next property is a RectF named position. This is where most of the properties are put to work. The column, width, padding, row, and height are all used to determine the left, top, right, and bottom coordinates of the rectangle. As with the PlayerShip class, the position property will be used for collision detection, movement, and drawing.
Next, we have some more properties that will probably sound familiar to the PlayerShip class. The speed, left, right and shipMoving values will keep track of which direction and how fast the ship is moving. The isVisible Boolean will keep track of whether we need to bother updating, drawing and doing collision detection on this particular instance.
Following on, in the class there is a companion object with two Bitmap instances initialized to null so that all the instances can share the same bitmaps. One for arms up and one for arms down. There is also a numInvaders value that will track how many instances are visible and will be quite useful in a few places throughout the codebase.
Proceeding on, in the init block which follows, both of the bitmap1 and bitmap2 two are initialized using the appropriate graphics and then scaled to fit our previously decided scale. Then numInvaders value is incremented. Remember numInvaders is in the companion object and is not a property for each instance and, therefore, will eventually hold the number of instances that are instantiated.
The update function is nearly identical to the one with the same name in the PlayerShip class. Depending on whether the invader is heading left or right the position property is manipulated left or right.
The dropDownAndReverseFunction will be called from KotlinInvadersView when an invader touches either the left or right of the screen. The code moves the invader down by a distance equal to its height + padding. Then the invader is made more dangerous by increasing its speed by 10% + the current wave number divided by 10. This is a quick and dirty formula to make the invaders get faster as they get lower as well as get progressively faster as the player clears more waves. Notice that the wave number is passed in as a parameter.
The takeAim function is the most complicated function of the class but isn’t really very technical. The function receives the player’s horizontal position, length in pixels, and wave number. The function then uses these values to determine how likely it is to take a shot at the player. If the odds look quite low then remember that this will happen for every invader about sixty times every second which adds up fast.
The first if block determines whether the invader is within a ship’s width on either side of the player. If it is then the formula is 100 * the number of invaders remaining divided by the wave number. If the outcome of this random number generation is zero then a shot is taken. This means that the fewer invaders remaining, the more vicious they will be, and in addition, the higher the wave number, the more vicious as well.
The second if block uses a simpler formula to take a shot that has almost no chance of hitting the player but will begin to wear down the bomb shelters and reduce the cover the player has. It is now possible to use the Invader class. Obviously, we will want a whole bunch of menacing Invader instances. Add these two properties to represent the invaders and control their numbers.
Add this code in the prepareLevel function that will be called each time we need a new wave of invaders including when the thread is first started.
Next, we can add the following code to the update function.
In the preceding code, we added a new variable called bumped and one called lost. Then the code updated all the Invaders including checking if we need to lower them and reverse their direction. After the updating is completed the value of bumped is checked and if it is true then the invaders are all moved down one row at the same time as checking if the invaders have reached the bottom of the screen. If they have then the lost variable is set to true. The lost variable gets checked and responded to later in the tutorial.
Finally, for the invaders (for now) we will draw them in their updated positions, each frame, in the draw function.
In the preceding code, we check the value of uhOrOh to decide which bitmap is used to draw the invaders in the current frame of animation. Currently, this doesn’t change so the same bitmap will be drawn over and over but we will fix this soon.
Let’s run the game and see where we are up to.

In the image above, if you look closely, there is something missing. Where is the player’s ship? What has happened is that the screen dimensions that we captured in KotlinInvadersActivity and then passed to KotlinInvadersView and subsequently used to position the player’s ship calculates the resolution of the entire screen and doesn’t make allowance for the app title which is displayed at the top of the screen. Therefore the player’s ship is drawn just out of sight at the bottom of the screen. If we make the game use the full screen and hide the title then the ship will become visible. Open the AndroidManifest.xml file inside the manifests folder. You need to add two lines of code as shown next.
Making Kotlin Invaders full screen
Next, I will show you the AndroidManifest.xml file in its entirety so you can identify where the preceding XML code goes.
If you run the game now you should see the player’s ship parked neatly in the bottom center of the screen.

Coding the Space Invader shelters
Let’s move on to the DefenceBrick class. We will use dozens of instances of this class to construct destructible barriers for the player to hide behind when things get tough. Create a new class called DefenceBrick and add the following code.
In the preceding code, we have a fairly busy constructor which passes in a column and row number as well as a shelter number and the screen resolution.
The properties keep track of whether the instance is visible and a crude but effective calculation is used to decide how wide and high each brick will be. We then use all the constructor parameters and the width and height to initialize a RectF that will represent the position of the current shelter. Let’s put the shelters to work in the KotlinInvadersView class.
Add these properties for the DefenceBrick instances.
Next, add this code to initialize the DefenceBrick instances inside the prepareLevel function just after the code which initializes the invaders.
We don’t need to update the bricks because they don’t move but we will add some code to detect when they get shot in a minute. Add this code to draw the bricks just after the code which draws the invaders.
This is what the game looks like if you run it at this stage.

Coding the Space Invader bullets
Now we will code the Bullet class. We will have a single Bullet instance for the player to shoot and reuse and we will have a whole ArrayList of instances for the invaders to use. Add a new class called Bullet and code it as follows.
In the preceding code, we track the bullets in the usual way using a RectF instance and update them in the usual way by moving it. Obviously, the bullets go up and down rather than left to right. We added a shoot function that will test whether a bullet is available (just a single bullet for the player like the original) but the invaders will have more.
Now we need to declare some properties for the player’s bullet and the invader’s bullets.
We can spawn the bullets in the prepareLevel function as we have come to expect. Do so after we initialized the shelters.
We can update all the bullets in the update function as usual.
In the preceding code, we check if the bullet is active and if it is we update it.
And we can draw all the bullets in the draw function. Add the code after the code that draws the bricks.
If you run the game then no bullets will be drawn. This is because we need to trigger them to spawn. Furthermore, we need to unpause the game loop. We will allow the player to unpause the game loop by tapping the screen. This is a good time to code the onTouchEvent function to control the player ship, un-pause the game loop, and fire some bullets. We will then add some code that triggers the invaders to fire at the player.
Playing the sound effects
Quickly before we do let’s add a class that will play all the sound effects. Add a new class called SoundPlayer and code it as follows.
In the preceding code, we declare an instance of SoundPool which does all the work. We also have a companion object with a bunch of integers which will represent all the different sounds that the SoundPlayer knows how to play. In the init block all the sounds are loaded from the assets folder into memory. Notice how each sound is associated with one of the integers from the companion object.
The one and only function is playSound that takes an Int argument to represent which sound we want to be played. The SoundPool class is used to play that sound using the play function.
Handling the player interaction
Code the onTouchEvent function as shown next.
In the preceding code, we use a when expression which has two possible outcomes. The first handles what happens if any of the player’s fingers have touched or is touching the screen. And the second handles what happens when any of them leave the screen. This is quite unsophisticated but its quick and it works. If you want to you can respond individually to different pointers and to move and touch events. This is beyond the scope of this tutorial.
The first if statement inside the first when outcome checks whether the player’s finger is below the bottom eighth of the screen and if it proceeds to detect whether it is in the left half or the right half. It then proceeds to set the moving property of the PlayerShip instance accordingly. Next time update is called on the player’s ship it will move as the player wants it to.
The second if in the first when outcome checks if the player has touched above the bottom eighth. If he has it attempts to fire a bullet by calling the shoot function. Whether or not this attempt is successful is decided inside the Bullet class. If it is successful a sound is played using our new SoundPlayer class.
The second when outcome simply stops the ship which is exactly what we want to happen when they remove their finger from the screen.
There will be an error in the preceding code until we declare the instance of SoundPlayer called soundPlayer as shown next.
Now you can run the game and fire off a single bullet with a satisfying peeowww sound – but only one.

The invaders will dutifully move left and right while getting lower for each pass of the screen. But the invaders do not flap their arms, make a noise, shoot back at the player and the player’s one and only bullet passes harmlessly through them. Let’s fix all those problems.
Shooting back and collision detection
Now we will code the invaders firing at the player. Add this code after the call to invader.update and before the if statement which checks if the invader has bumped the edge of the screen.
In the preceding code, we loop through each invader that is active and call the takeAim function. The Invader class uses the logic inside the function to decide whether to take a shot. If it returns true the next bullet in the array of bullets has its shoot function called. If that function returns true as well then a new bullet is fired, a sound is played and the nextBullet value is incremented. If the nextBullet value gets as high as maxInvaderBullets then nextBullet is set to zero and the invader bullets ArrayList gets reused.
We are nearly done. The big job that is remaining is collision detection.
It will use the RectF.intersects function to check the following combinations of collision.
- Player bullets with an invader
- Alien bullet with a brick from a shelter
- Player bullet with a brick from a shelter
- Invader bullet with the player ship
Study the code that follows and note the actions that are taken when each of the different collisions occurs. Lives are removed, the score is increased, sound effects are played, objects are set to inactive/invisible. Add the code to the end of the update function.
If you run the game now you can move, shoot, destroy invaders, build up your score, and be shot at by the enemy as well.
Finishing the game
What we need to do to finish off is write and call a new function that handles the menace level and plays a sound and then save the high score so the player can come back another day and try and beat his best score.
Add the menacePlayer function to the KotlinInvadersView class as shown next.
Now we will call this function selectively from the run function. Add the following code near the end of the run function but inside the while loop.
Now the invaders will flap their arms while making a menacing sound; that gets more menacing each time they cross the screen and drop down a little. Furthermore, this menace level as well as the speed, and the invader frequency of shooting will increase as the player clears more waves of invaders.
Saving the player’s high score
Let’s save the player’s high score. Add the following property before the declaration of the highScore property and change the initialization of highScore to load a value from the device storage.
And add this code to the end of the pause function so that every time the player quits the game the code checks if a new high score was achieved in the current play session and if it was, save it to the device storage.
The initialization of the SharedPrefferences instance created a label “Kotlin Invaders” that could be referred to access and store data. In the line of code that initialized the highScore property, the getInt function accessed this storage. The reason there are two parameters for getInt is the second parameter is a default value in case there is nothing in the storage; which there won’t be the first time the game is executed.
In the pause function, the value is retrieved again and compared to the highScore property. If the highScore property holds a higher value than the device storage then a new high score is saved into the device storage using a SharedPreferences.Editor instance.
Improving the Space Invaders code
The biggest problem with the code in this tutorial is its structure. We have achieved only a simple retro shooter and yet the main class is around 500 lines long! You can imagine that if we were to add some more invader types and a few extra features then the code would quickly become unmanageable. The solution isn’t especially complicated but it does amount to quite a big tutorial to demonstrate. Hopefully, a quick overview instead will be helpful.
We could put all the game objects into an inheritance hierarchy and store them all in a single ArrayList. Furthermore, we could get all the objects to draw themselves; they could each have a draw function. We could then shrink down the update and draw functions in KotlinInvadersView to just a for loop each. We could also pass the onTouchEvent function data straight to the player game object and it could decide how to handle it.
This then leaves the problem of how we distinguish between the different types of objects for collision detection. One way to solve this is to give every game object a label/tag. All we would need to do then is decide on some special cases (as we did in this tutorial) and loop through the objects looking for the cases we care about.
Another pattern that is useful as our games get bigger is the entity component pattern. This involves having a single hierarchy for every game object; let’s call it GameObject and then every instance has an ArrayList of components; let’s call them Components. You could then design components that draw, components that think, components that chase the player, components that avoid the player, etc. This would mean you could have wildly different game objects from a dumb brick with just a drawing component through to an intelligent enemy with multiple update components and a draw component. Hopefully, I will have time to show some examples of this in the near future.
Congratulations
Congratulations on reaching the end of the tutorial! What is next then? I will keep adding tutorials to this site as well as to YouTube. I intend to add more advanced tutorials than this as well as some simpler tutorials to help newcomers build up to this one. They do take quite a long time to write though so I won’t promise any particular schedule.
![]()
override fun onTouchEvent(motionEvent: MotionEvent): Boolean {
return true
}
I have learned that if I want to override an already existing function, the super.onTouchEvent() should be written. For example the super.onresume().
why isn’t it the case for onTouchEvent
Hi there, good question. Super… calls the overidden function from the parent class. This is not always required as in this case. Another difference is that in this case onTouchEvent is implementing the function of an interface. In this situation we must do so or the program will not compile. Try commenting out onTouchEvent and you will see you have an error. This is because the app implements surfaceview.Remove the implementation of SurfaceView and the error is gone.. but we don’t have the drawing facilities.
Good initial tutorial but there are several issues when trying to use Kotlin 3.5. For example, you cant assign the Random class to a variable with a constructor as its abstract:
val generator = Random() // This gives a compiler error about trying to instantiate an Abstract class (even using Kotlin 1.3)
Also changing the theme in the Manifest will throw an error, since the theme is inheriting from AppCompat
and our Activity isn’t.
be b
Also using the bitmap references from Bitmap? requires you to add the null negation to any further references eg. bitmap1 should be used as bitmap1!! as the compiler warns it could be null.
Good effort, though, I followed most of it quite well, I look forward to an updated version of the tutorial soon.
Hi Steve,
Thanks for your tips they are very useful. I will publish them here so they might help future readers.
Thank you very much for this tutorial I got everything working, there were a few lines that gave me errors, as you can see here,
canvas.drawBitmap(Invader.bitmap2!!,
invader.position.left,
invader.position.top,
paint)
I had to add the !! after Invader.bitmap2, think there were 4 locations that I could not get working without adding these. Also trying to get rid of the title bar was a nightmare I eventually found a way to do it with the styles.xml that did not crash the program, I am really clueless as to why neither of these things worked for me but I got through it.
Also sometimes (20-30% of the time) the ship keeps on moving when I have stopped touching the screen, I am unsure why this is and might just be my phone.
I am still learning so working through this was very helpful and I thank you for putting so much time into the tutorial for us.
Hi Jon,
Regarding the ship keeping moving it is because the controls are too simplistic. Try to make sure that only one finger is in contact with the screen at any one time.
!! is interesting but too big to talk about here. Take a look at this article.https://kotlinlang.org/docs/reference/null-safety.html
Thanks for your kind comment
Hey Jon,
Steve partially addressed some of your issues in the comment above, but let me try to add some clarity as well:
1) Null Checks (where you added !!):
This is due to the way that the Bitmaps are being initialized. Using a question mark means the variable could be holding a null value. Kotlin tries its best to avoid the dreaded NullPointerException that has plagued Java for oh so long and so gives you compiler warnings saying the value can’t be used since it might be null. You can either add a check to ensure the value isn’t null, use !! (like you did) which is you telling the compiler, “I’m 110% certain this value will never be null, ever!” and will crash your app if you lied, or you could use a lateinit expression to tell the compiler that you’re not going to initialize the value just yet, but you promise to do it later.
Fix: https://github.com/EliteIntegrity/Kotlin-Invaders/pull/3/files
2) Removing the App Title Bar
This is likely due to the IDE you used to generate your main activity class. Android Studios (and potentially other IDEs) will create a class that inherits from AppCompatActivity() by default. The code in this tutorial was written so that KotlinInvadersActivity inherits from Activity(). The fix here is to simply update your main activity to inherit from Activity() instead of AppCompatActivity().
Fix: https://github.com/EliteIntegrity/Kotlin-Invaders/blob/master/kotlininvaders/KotlinInvadersActivity.kt#L7
3) Perpetual Motion
The issue where the ship doesn’t stop moving is a simple logic bug (nothing to do with your device). The logic for moving the ship triggers if you touch the bottom 1/8th of the screen, but the logic to stop the ship moving only triggers if you let go on the bottom 1/10th of the screen. Meaning there’s a small area (1/40th of the screen above the bottom 1/10th of the screen) where the movement logic can be triggered, but not un-triggered.
This is a great example of why DRY (Don’t Repeat Yourself) code is so important. The code `size.y – size.y / 8` was intended to be used 3 times in rapid succession. Likely while the author was tuning the code and updated the first 2 instances, but missed the last which resulted in a bug. Extracting that value out into a local variable at the start of the onTouchEvent function would a) make tuning easier and b) avoid the chance of creating this type of bug again.
Fix: https://github.com/EliteIntegrity/Kotlin-Invaders/pull/1/files
Can anyone explain how in KotlinInvadersView, setting “paused” to false calls the “Pause” method?