
Setting up your Android development environment does not have to be hard. In this tutorial, I will walk you through all the steps required to install Android Studio 2.2.2. By the end of the tutorial, you will be ready to build and deploy your first Android games and I have written quick tutorials on how to build and how to deploy for the first time.
![]()
In this project, we will use the Android Studio new project wizard to build an app we can actually run on a real Android device.
The first step is to install the Java Development Kit (JDK). The JDK is what facilitates our programming in Java. As the vast majority of Android programming is done in Java, this is a vital step. We will then install Android Studio which will use the JDK behind the scenes. At this stage, we can start building games for Android.
Installing the Java Development Kit(JDK)
Go to the download page for the JDK. Click on the Download button under the JDK option.

Check the Accept License Agreement checkbox and then click on the download that matches your operating system.

This tutorial is specifically for Windows and the screen images are from Windows 10 but the instructions should be very easily interpreted for earlier versions of Windows and not too much trouble for experienced Mac and Linux users. Mac and Linux users can find JDK install instructions specifically for them below.
Installing the JDK on Linux
Installing the JDK on Mac
Once your download is completed, run the .exe file that you just downloaded. As with most software installations on Windows, You will need to give permission to run the file. Now we can step through some simple choices to get the JDK installed. For the first option, simply click Next.

The details of the next step are shown in the image below. I suggest leaving all the options at their defaults if possible. The only thing you might want to change is the default install location if the suggested hard drive is nearly full. If you do change this and get problems later on, look at the troubleshooting section at the end of the tutorial.

The setup process will get busy for a little while and then you will be asked where you want to install the JRE as shown next.
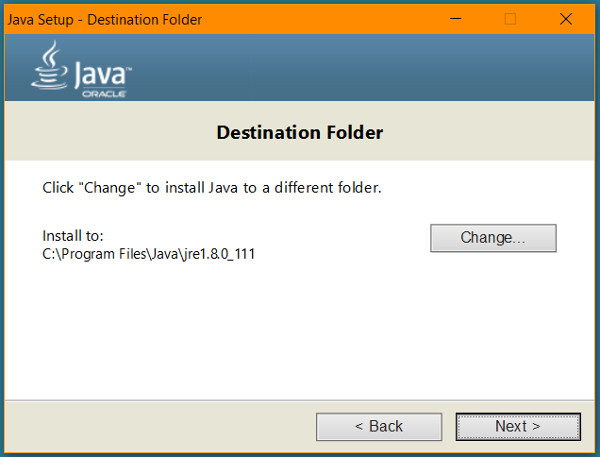
This is the regular part of Java that is used to run Java programs on your PC. I would suggest installing it in the same place you chose for the JDK. So if you didn’t change anything in the last step, just click Next.
In the final part of the JDK installation, you can click Close. It is not necessary to read the Next Steps option. they are nothing to do with Android game development.
Now we can set up the latest version of Android Studio.
[widgets_on_pages id=”udemy_advert_java_2″]
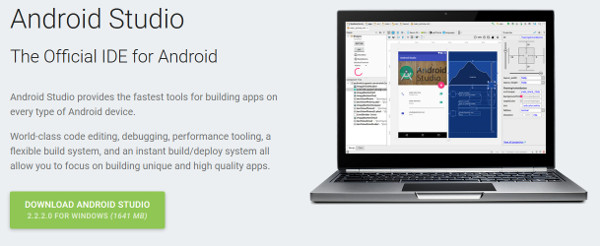
Downloading Android Studio
As mentioned at the start of this tutorial, Android Studio is where all the actual game programming will take place. Most Android coding uses the Java language and this is the reason we installed the JDK first.
To get started installing Android Studio 2.2.2, visit the download page and click the Download Android Studio button, accept the terms and conditions and accept the file download.

If the latest version has changed at the time you are reading this then go with the latest version. You should find that these instructions are still viable as the process hasn’t changed much even since the early days of Android Studio. The download might take a few minutes or perhaps a bit longer depending on the speed of your Internet connection. The file is about 1.6 gigabytes.
Installing & configuring Android Studio 2.2
Once the file is downloaded run it and follow these simple steps to configure it. On the first window click Next.

On the next window leave the default options to choose to install Android Software Development Kit (SDK) along with a Virtual Device in which we can test games. Actually, I will show you how to test your games on a real device but the Virtual Device can still be useful.

In the window that follows you just need to agree to the license.
In the Configuration Settings window that follows next, you can leave everything at the default to let Android Studio decide where to install itself. Look carefully, however, at the disk space required. It is quite significant (nearly 4GB). If you change locations, make a note of the exact locations that you choose and refer to the troubleshooting section at the end if something doesn’t work later.
On the final screen before the main installation is performed click Install. Android Studio will be busy for some time now preparing itself.
When the installation is complete, click Next, then Finish. If this is the first time you have ever installed Android Studio choose I do not have a previous version of Studio or I do not want to import my settings from the popup dialog box and click OK.
Configuring the Android SDK
We are in the very final stages now. When you are greeted with this next window, click Next.

In the Install Type window that follows choose Standard and click Next. This allows Android Studio determine the best versions of various final components to download and install. Click Finish.

After a wait, while more files are downloaded and installed, click Finish. And this time you really are finished! Maybe.
If everything has gone well you will now be faced with the Android Studio start screen where you can begin to make games. If you see the image below, move on to the tutorial Building your first Android game. If not, don’t panic and read on.

Troubleshooting
If you have any trouble at all, perhaps the Android Studio start screen doesn’t appear or you get one of the several possible errors that mention “the path to the JDK” then you need to take one more step.
We need to make sure that Windows and Android Studio know where to find the JDK. Right-click on your My Computer icon (This PC on Windows 8, on Windows 10 you can search for Edit the and click on Edit System Environment Variables).
Navigate to Properties | Advanced system settings | Environment variables | New (under System variables, NOT under User variables). Now you can see the New System Variable dialog box.
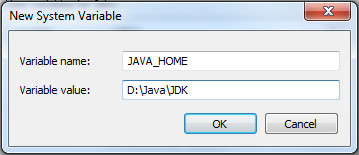
As you can see in the previous image, type JAVA_HOME, for the Variable name field. In the Variable value: field, enter the folder/file path you made a note of when installing the JDK. The image above shows what you need to put if you installed to D:\Program Files\Java\jdk1.8.0_05. Your exact file path will have a different ending to match the latest version of Java at the time you downloaded it and the location you chose.
Click on OK to save your new settings. Now click on OK again to clear the Advanced system settings dialog box.
You are now ready to start programming games for Android using Android Studio. Move on to the tutorial Building your first Android game.
![]()
John, I installed the jdk. Which settings do I change for my pc in windows 10?
Hi there,
The only difference should be the way you access the window to enter JAVA_HOME (step 8). On Windows 10 you can search for “Edit the” and click on “Edit System Environment Variables”. Select the “Advanced” tab and click on the “Environment Variables” button. You should now see “New” (under “System variables”, not under “User variables”). Now you can see the “New System Variable dialog box”. And your ready for step 9.
Hope this helps.
Thanks a lot
Hi John.
My windows version on PC is wiindows 7 ulitmate and I can’t right click my computer icon to search for Edit the and click on Edit System Environment Variables?
Can you help me?
Hi there,
On 7 you should be able to right-click My Computer icon, either in Start menu or on the desktop. Then select Properties | Advanced system settings | Environment variables | New (under System variables, not under User variables). Now you can see the New System Variable dialog box.
Unless 7 ultimate has different functionality.
Hope this helps.
I followed the directions, but when I try to open Android Studio, it gives me an error message that says
“The environment variable JAVA_HOME (with the value of C:\ProgramFiles\Java\jre1.8.0_101) does not point to a valid JVM installation.”
Could you please help me figure out what I did wrong?
Hi there, thanks for your comment. The error suggests that your java home variable has been set to the wrong folder. Go and have a browse at the java install folders and find the folder that says jdk, not jre. Set the java home variable to that and Android Studio should spring into action.
Hope this helps.
Thank you!
would other java development software such as intellij work for this or not
Yes IntelliJ will work fine as Android Studio is derived from IntelliJ. Other IDE like Eclipse can be used but will likely be more difficulty to get started or find specific Android tutorials and problem solving help.
ok thanks John!